- Tap Settings on your iOS device
- Select Wi-Fi.
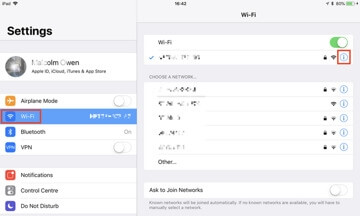
- Tap the small “i” icon next to the name of the WiFi network that needs the DNS server details changed.
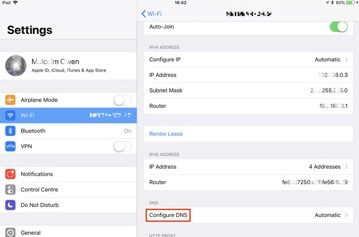
- Scroll down, and tap Configure DNS.
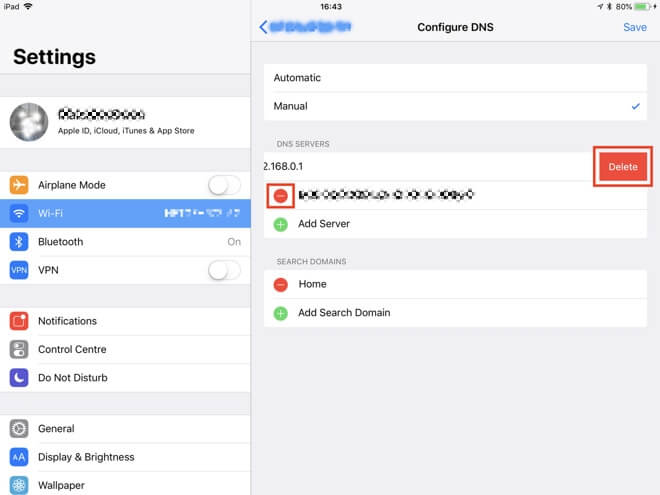
5. At the top, change the setting from Automatic to Manual.
6. In the section below, tap the red minus circle next to the DNS servers followed by Delete to remove them.
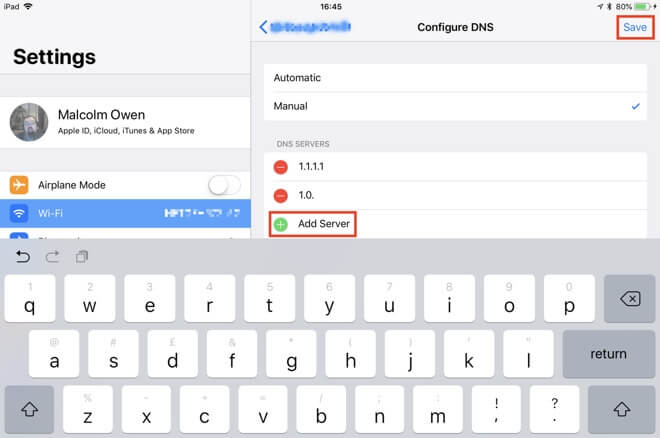
7. Tap Add Server, then in the new empty listing, type in your Smart DNS IP address carefully. Delete a second listing if a redundancy option is available.
Leave only one DNS record!
8. Once finished, tap Save in the top-right corner.
The same process can be used to change the servers again at a later time or to revert back to the connection’s default. To use the DNS server the Wi-Fi network specifies, change from Manual back to Automatic.
Attention !!!
Make sure to RESTART your iPhone or iPad! Now you can watch your favorite TV abroad.
Important: the change will only apply to a specific Wi-Fi network, not for all Wi-Fi networks.
This setting needs to be changed on all Wi-Fi networks you wish to use a specific DNS server through.
Important setup notice if you see this message in your iOS device:

– Turn iCloud Private Relay off for a Wi-Fi network
Go to Settings > Wi-Fi, Tap the small (i) icon, then turn Limit IP Address Tracking off.
– Go to Settings > [your name] > iCloud > Private Relay, then tap Private Relay,
turn off iCloud Private Relay completely: Tap Turn Off Private Relay.
– For Safari browser: Settings > Safari > Hide IP Address > Off
Smart DNS Setup Instructions for older iOS versions.
- To setup smart DNS in your iPad or iPhone with iOS you need to do the following steps:
- 1. Open Settings
- 2. Tap Wifi
- 3. Tap Your Network
- 4. Select ‘Configure DNS’
- 5. Select ‘Manual’
- 6. Remove DNS servers if any exists
- 7. Click on Add server and enter YOUR SMART DNS IP Address, Save the settings and restart your iOS device.
- If you have older iOS versions please do the next:
- 1. Open Settings
- 2. Select Wi-Fi
3. Press the blue arrow on the right of the router you are connected to. Or if you use IOS 7 simply click the info icon instead.
 4. Input your Smart DNS IP address. Use “,” to separate several IPs.
5. Tap Wi-Fi to get back6. Restart your iPhone or iPad
Important
Always log out of apps and restart it after you changed the location.
If you are having issues with the DNS not being saved then press forget network and connect to your Wifi again.


Recent Comments