How to Setup VPN in iOS (iPhone/iPad)

To setup SSL (SSTP) VPN connection in your iPhone or iPad please follow the next instructions:
1. Install Cisco Anyconnect app from App Store
2. Open Anyconnect app and in Settings section uncheck “Block Untrusted Servers” to allow it.

3. Back to Home, tap Connections -> Add VPN Connection.
4. Enter Description (any name) and Server Address. Tap Save
5. Swipe the AnyConnect VPN switch from OFF to ON and tap Continue

6. Input Username tap Connect, input Password and tap Connect.
7. Wait for the connection.


Please note that you can also use Open VPN in your iPhone.
For this you need to install Open vpn application on your iPhone and use Aeroshield VPN data (vpn server address, login, password)
To make a new vpn connection in your iOS device you need to do the next:
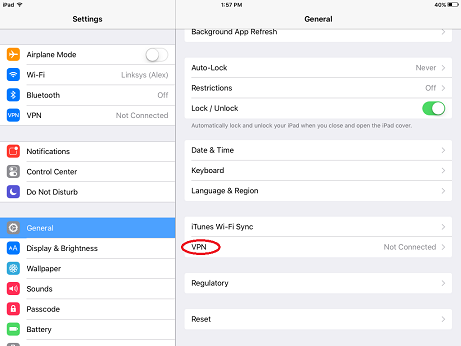
- Go to Settings > General > VPN

2. Click Add VPN Configuration. Select L2TP VPN and click Back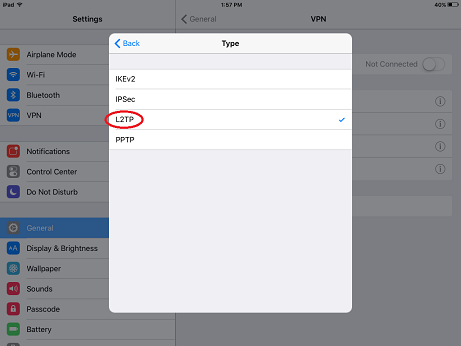
3. Input you VPN account data – server, account and password. You get these data from Aeroshield service in the e-mail after ordering vpn. Fill the Secret field – secret (small letters)
Please note:Server address must be exactly as in your account data (without http://, www or any other symbols)
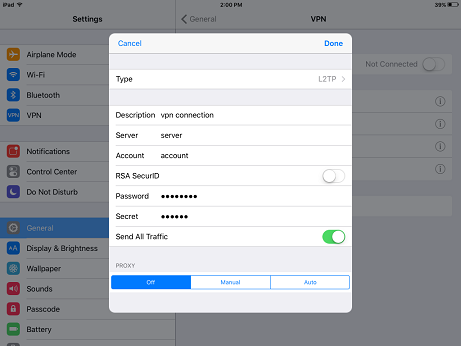
4. Tap Done to save the settings.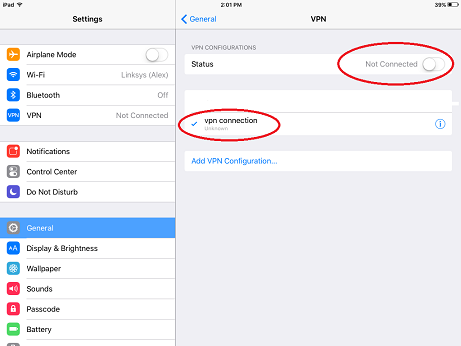
Once you have created vpn connection you can switch it on and off on the main settings screen.
1. Setup OpenVPN Connect application from AppStore on your iOS device.
2. We send you configuration file *.ovpn (file name can be different depending on the server location)
You can find it in the attachment to the letter that we send you.
Please open it on your iOS device in Mail app and select Open it in OpenVPN.
Very important to open config file exactly in Mail app. Otherwise it can’t be opened by OpenVPN application.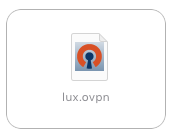
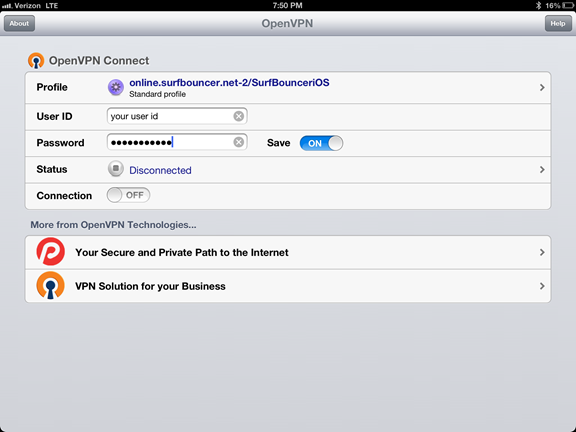
3. Click + in the right bottom corner. The next window should appear
 4. Enter ‘UserID’ and ‘Password’. ‘UserID’ is your VPN username. Tick ‘Save’ and switch ‘Connection’ to ON.
How to Setup VPN in Android

Please download and install AnyConnect VPN client by the link and follow the guide:
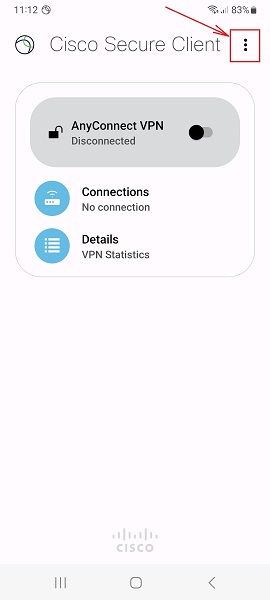
1. Launch “AnyConnect“ app on your Android device and tap 3 dots as shown.
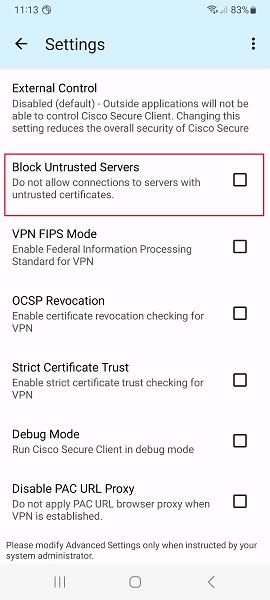
2. Disable (uncheck) Block Untrusted Servers and tap the back arrow.
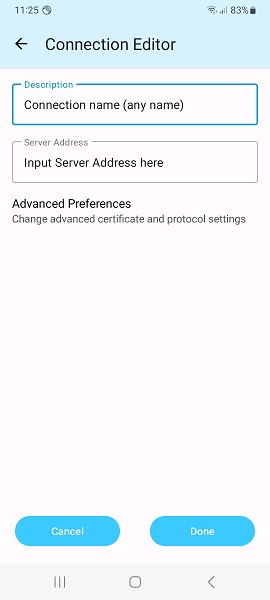
3. Tap + icon to add a new connection.

4. Fill the Description (it can be whatever you want).
Input Server Address (it is given in your account data) and tap Done and back arrow.
Note: Server Address must be exactly as in your VPN account data. No extra symbols or spaces are allowed.
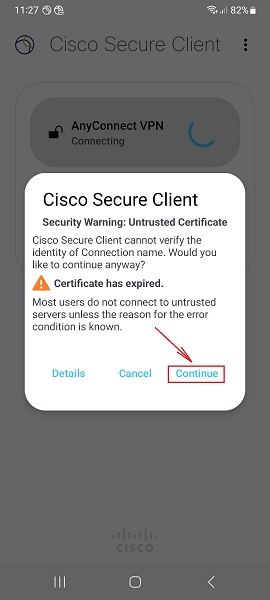
5. Switch the switcher on the main screen to the right to connect.
Tap Continue on the pop up window and enter your Username/Password on request.
Wait for the connection and enjoy the Internet.
How to Setup VPN in Mac OS

Download Cisco Anyconnect VPN client for Mac OS X
First Download Cisco Anyconnect VPN client for mac from the link below:
When the download process is complete, open your Downloads folder and double-click the AnyConect dmg file.

Step 1
Install Cisco Anyconnect VPN client for Mac OS X
Double click on AnyConnect.

If you see the message: “This package will run a program to determine if the software can be installed” , Click on “Continue”.

Click on “Continue”.

In This window click on “Continue” .

Click on “Agree”.

Check the “VPN” and click “Continue”.

Now click on “Install” and enter your computer username and password when prompted. (NOTE: the user must be an administrator of the machine to install).

When installation complete click “Close”.

Step 2
Configure Cisco anyconnect VPN client Mac
Cisco AnyConnect VPN client can be found in the Cisco folder located in the Application folder.
Navigate to /Applications/Cisco/ and open “Cisco AnyConnect VPN Client“.

In the text box enter VPN server address that you can find in your account data

If you get a message “Untrusted VPN server blocked” , click on “Change Setting”.

Uncheck “Block connection to untrusted servers” ,then click on “Connect” again.

Enter your VPN username and click “OK”

Enter your password and click “OK”.

You are now connected to Cisco anyconnect vpn for Mac OS X.To disconnect Cisco anyconnect VPN , click on “disconnect” as below.

How to Setup VPN in Windows

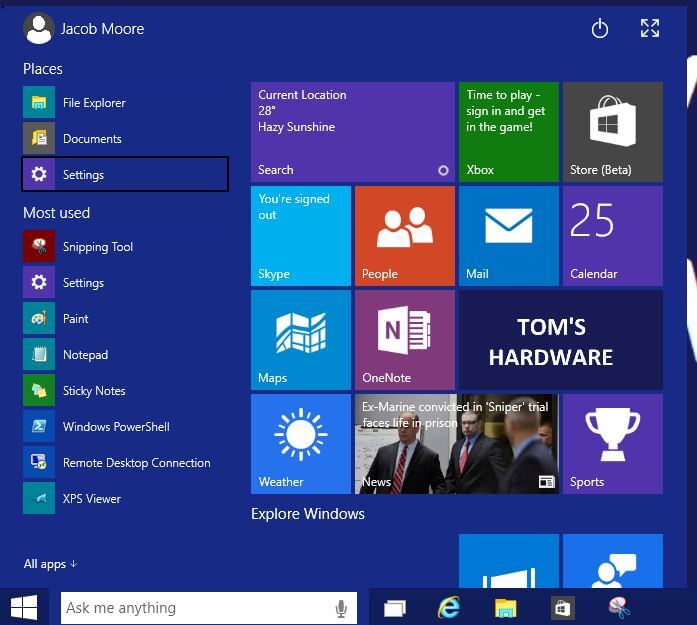
- Click the Start button — it is in bottom-left corner of the screen.
- Click Settings — it is on the left section of the displayed Start menu, under the Places section.

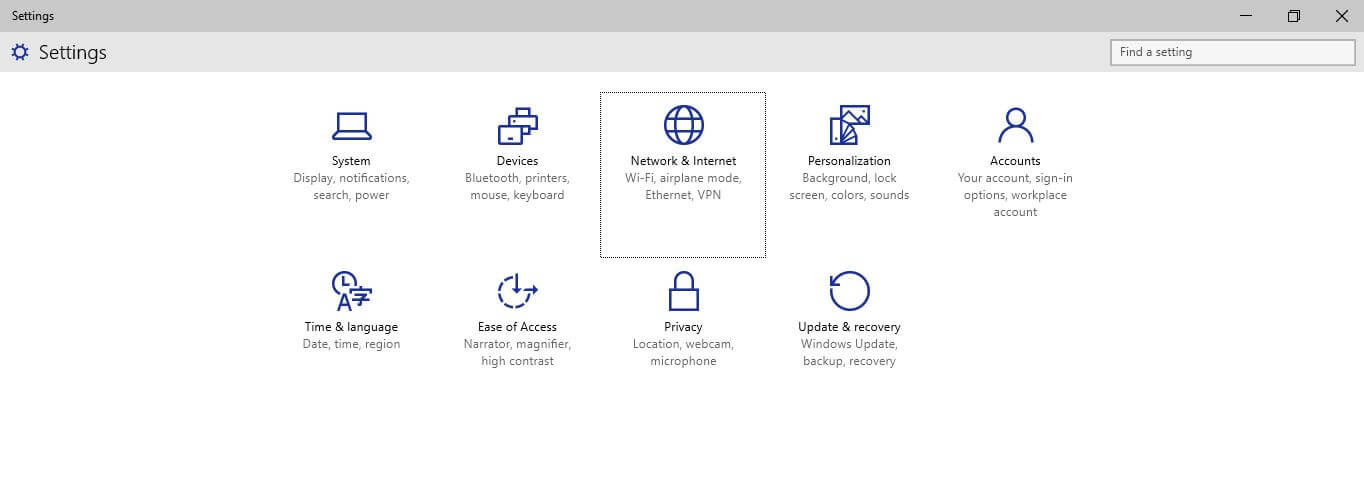
- After that click the Network & Internet icon on the Settings window.

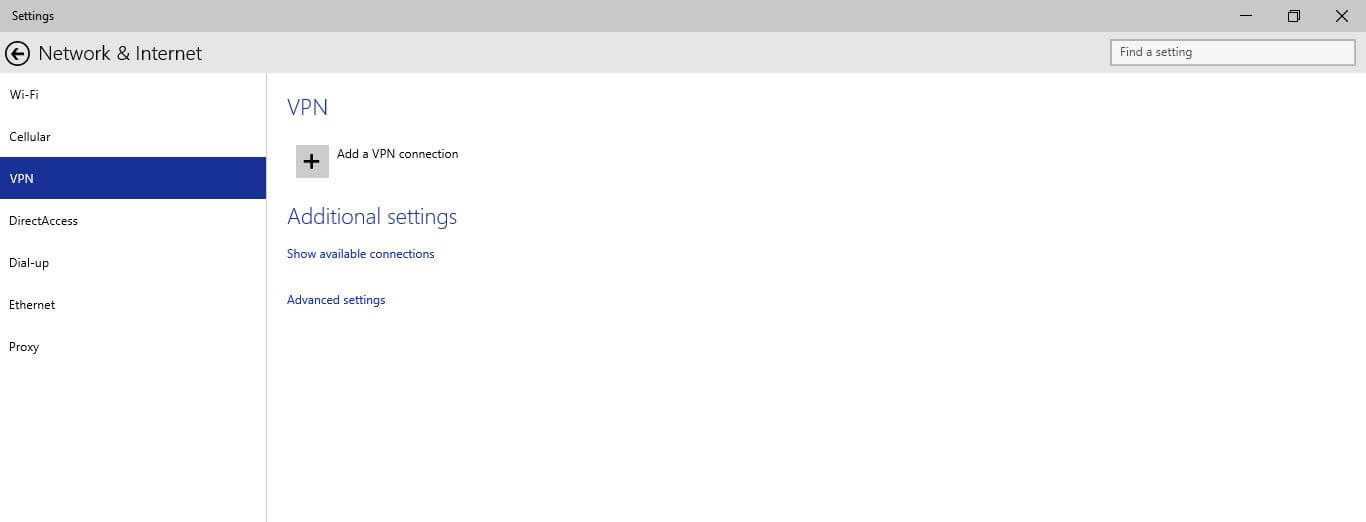
- Click to select the VPN category — on the left panel of the Network & Internet window.
- Click the + icon representing the Add a VPN con the right.

- Input correct data on the Add a VPN connection box.
- If you would like to save these data (if you are doing this from home for example) check Remember my sign-in infocheckbox at the bottom, and click Save.
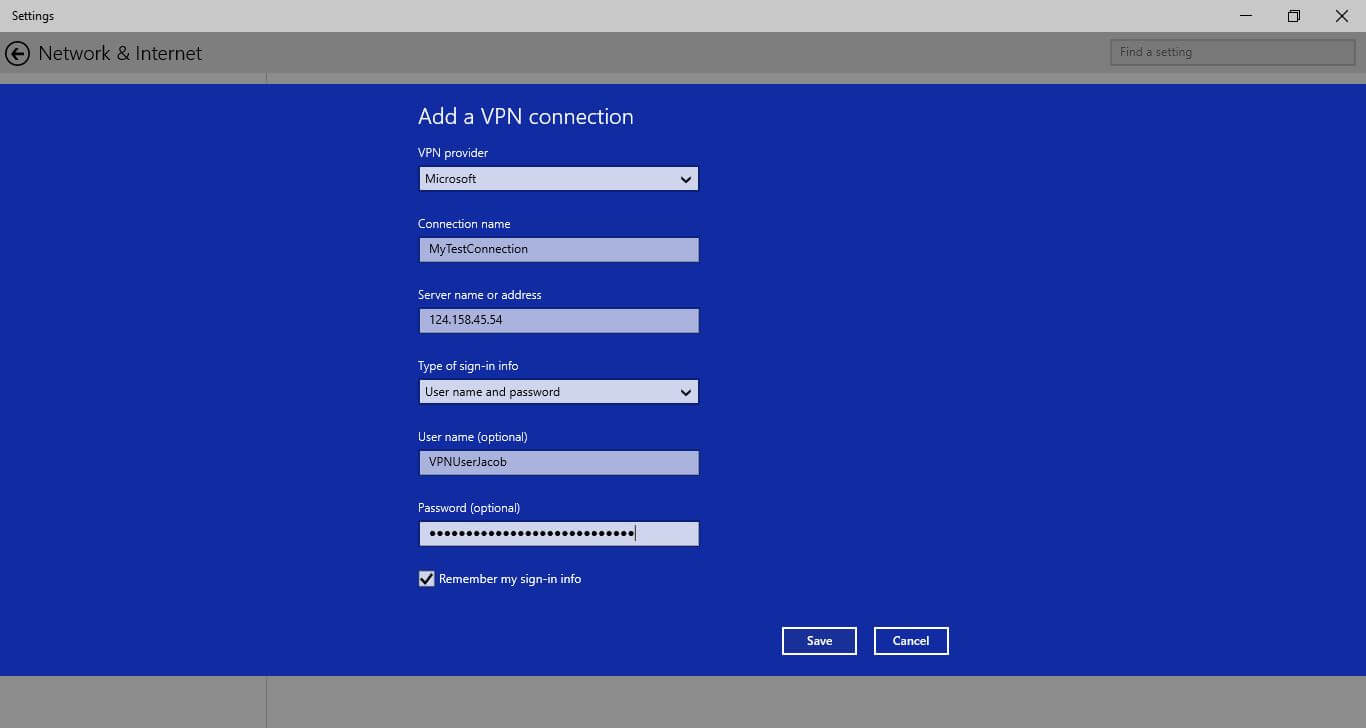
Note: You may not want to save the sign-in info on public computers such as those in Internet cafes, or libraries. Do NOT check the Remember my sign-in info when using such computers.
Now your new VPN connection is successfully created.
Go to the Network & Internet window, keeping the VPN category selected from the left pane, click to select the newly created VPN connection from the right.
Once selected, from the available buttons, you can either click Connect or Forgetto connect to the VPN server using the provided details and credentials, or to remove the created connection respectively. Optionally, if needed, you can also click the Properties button to make changes to the created VPN connection.
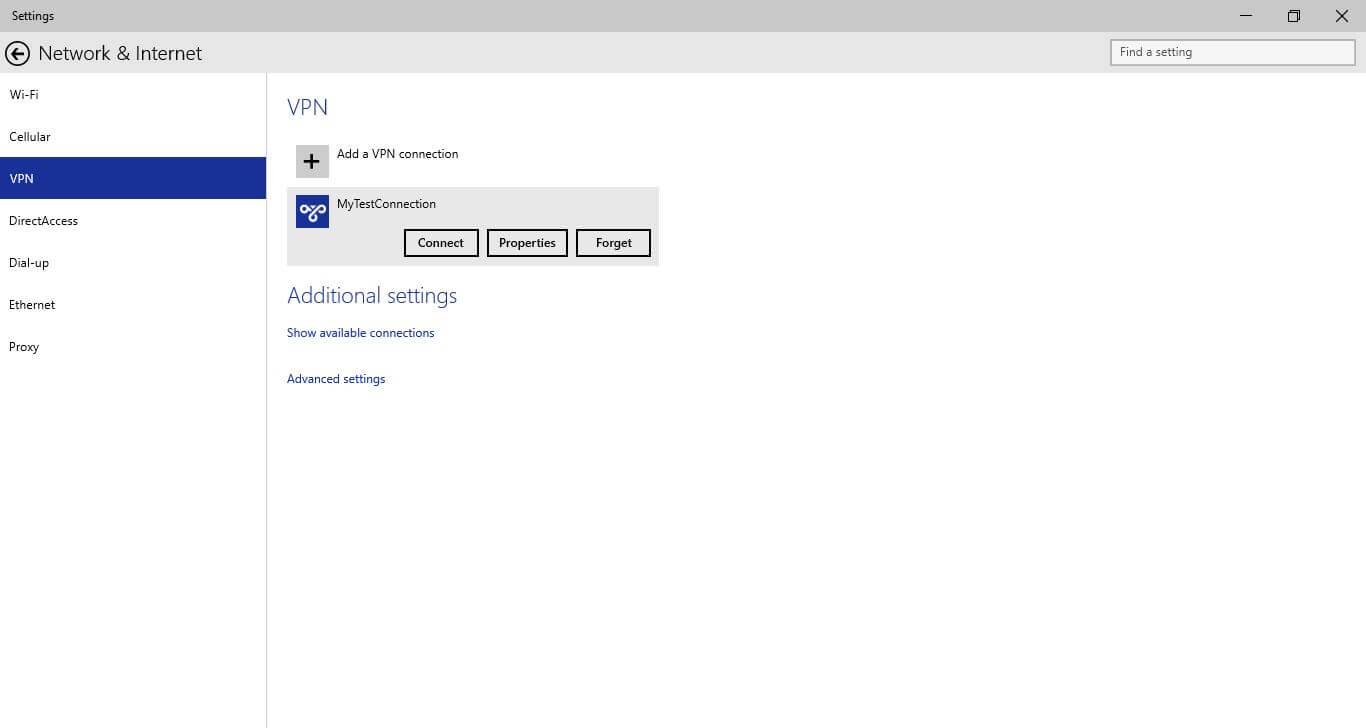
Optionally, you can click the Advanced settings option under the Additional settings section on the same window to manage other VPN connection related configurations such as proxy settings, automatic detection, etc.
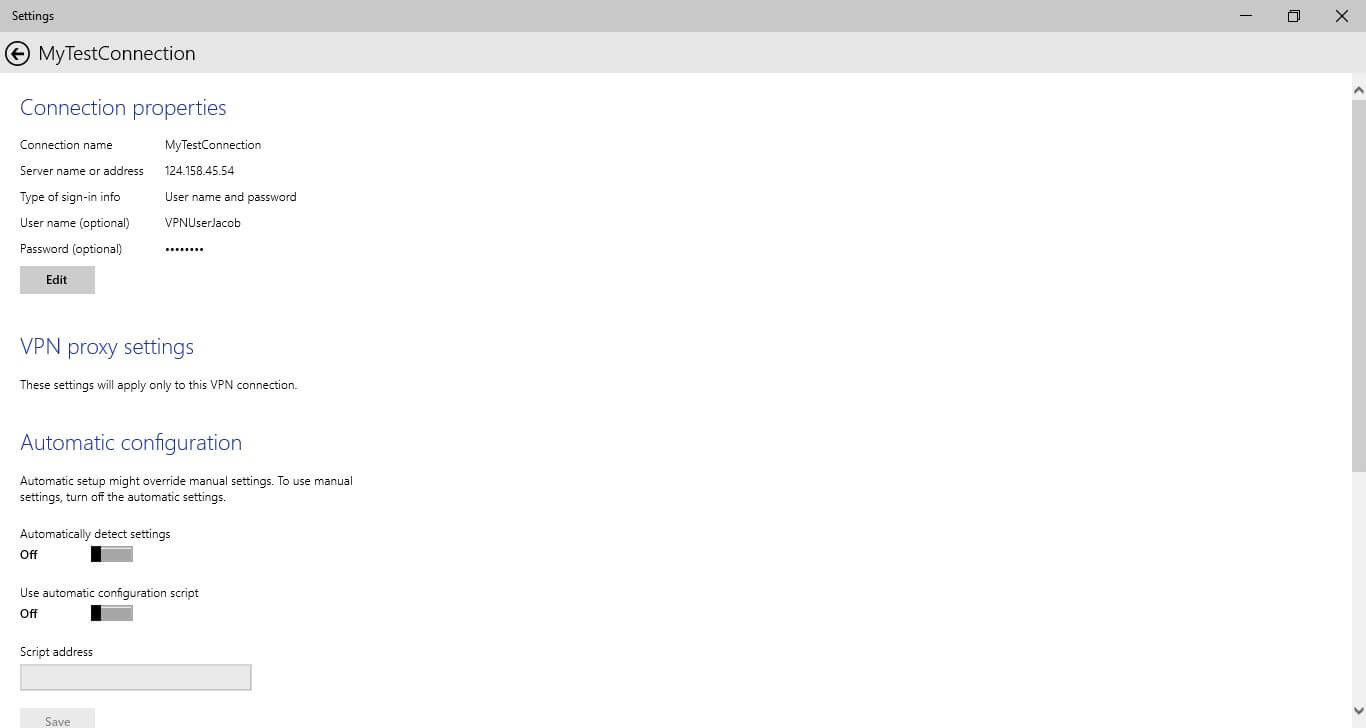
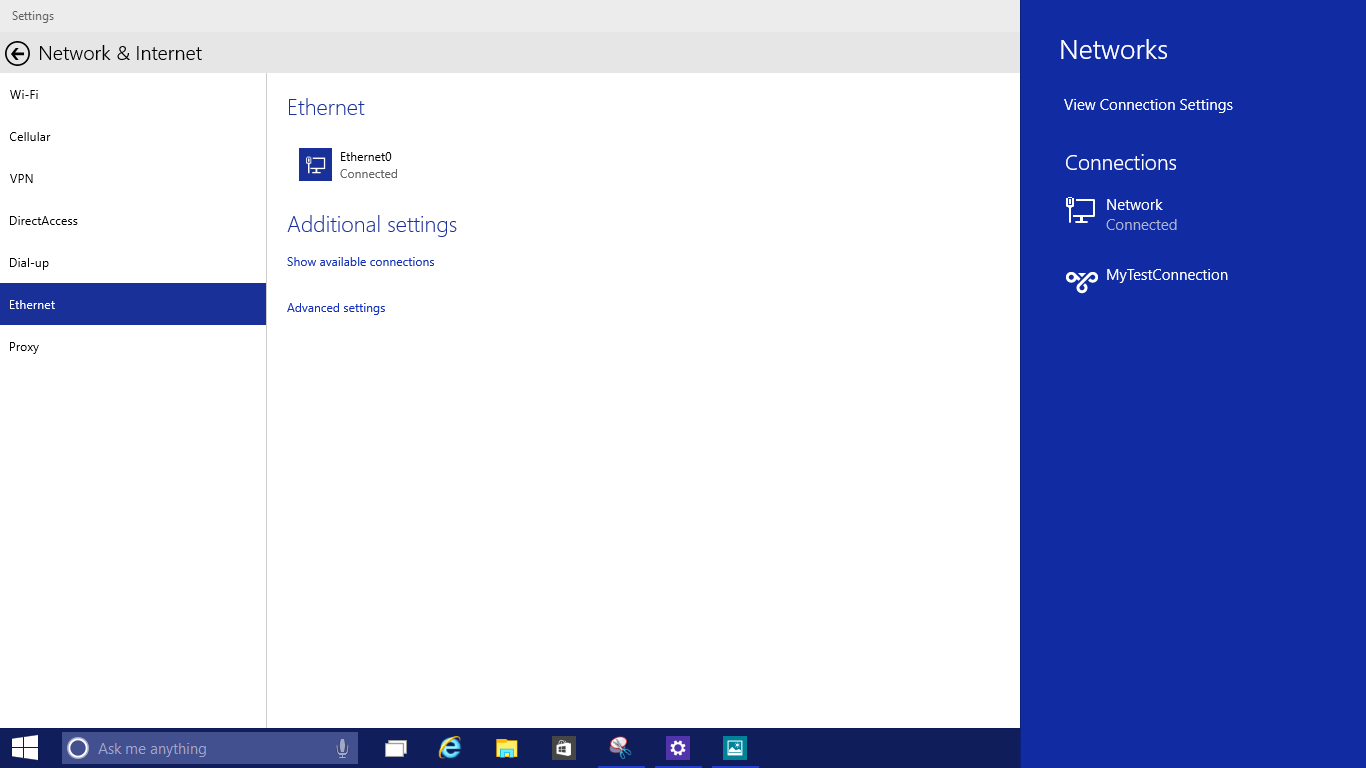
After closing all the windows, you can still easily connect to the VPN server by clicking the Network icon from system tray at the bottom-right corner of the window, and clicking the Show available connections under the Additional settings section of the Wi-Fi or Ethernet category of the opened Network & Internet window.
To setup vpn connection in Windows 8 please follow the next steps:
1. Display the Charms bar, click Search, and then click Settings.
2. Type VPN into the Search box.
3. Click the Set Up a Virtual Private Network (VPN) Connection button in the Search results pane.
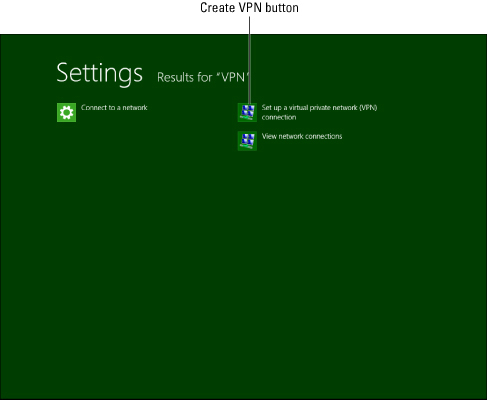
4. The VPN Connection wizard appears. Enter the following information:
- * VPN server address from your account data that you received from Sahrzad into Internet Address text box. Please be carefully – don’t use any additional symbols like spaces, http://, www, / …etc in the server address.
- * Destination Name. It’s just a name of your connection. For example it can be “Sahrzad VPN”.
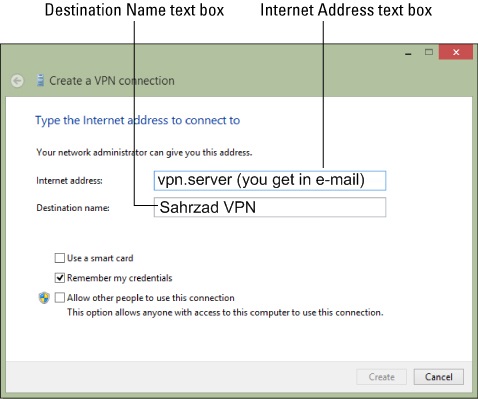
5. Click Create.
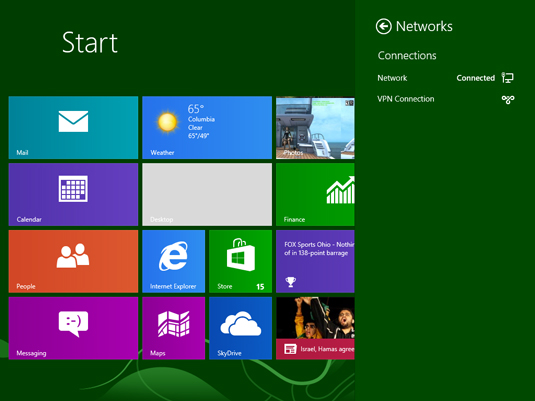
VPN connection is created and Windows 8 displays it under the Networks heading in the Charms bar. Click on it to connect.
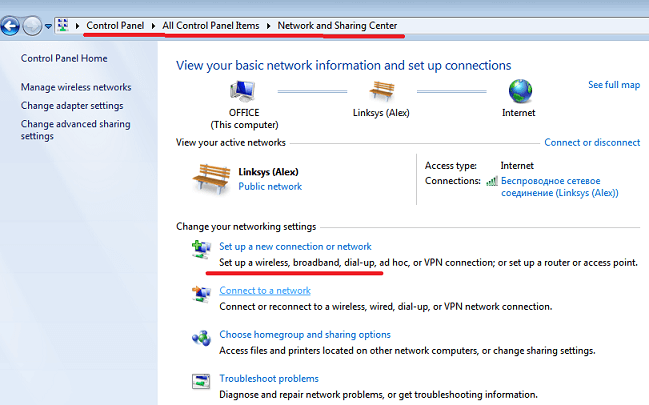
- Click “Start” button, “Control Panel” and choose “Network and Sharing Center”. Choose “Set up a new connection or network”

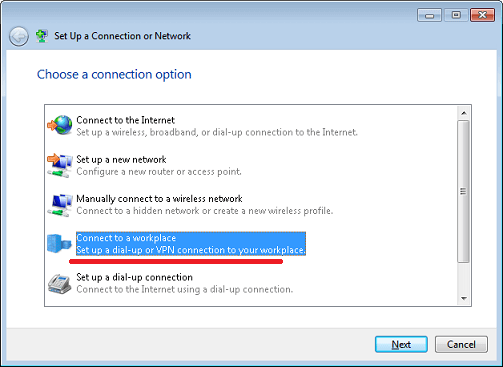
- Choose “Connect to a work place” and click Next

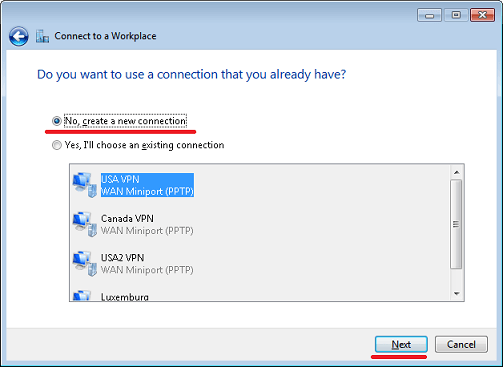
- Choose “No, create a new connection” and click Next

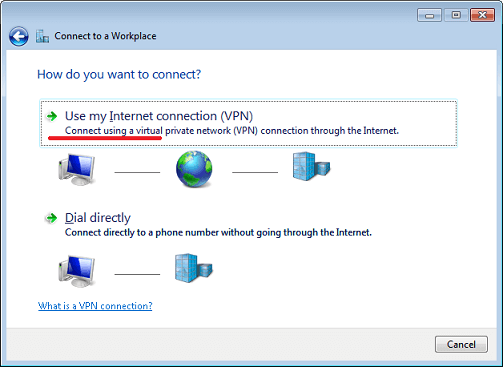
- Click “Use my Internet connection”

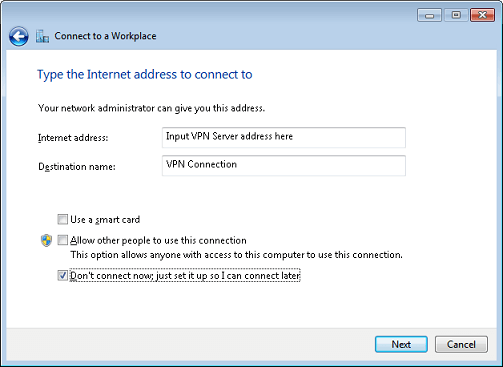
- Input VPN server address from your account data into “Internet Address” text box. Please be carefully – don’t use any additional symbols like spaces, http://, www, / …etc in the server address.Input “Destination Name”. It’s just a name of your connection. For example it can be “VPN Connection”.
- Click “Next” button

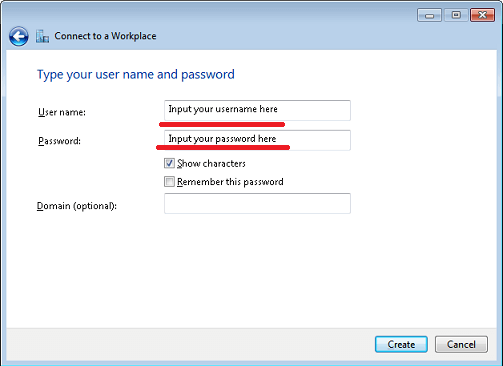
- Input your Username and Password. All the letters should be small!
- Click “Create” button and and then Close the window.

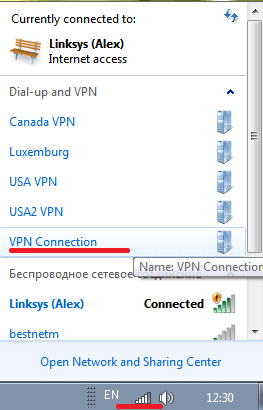
- Click on your Internet connection icon in the right bottom corner (it can be WiFi or Cable icon) and you will see your VPN Connection. Click twice on it.

- Click “Properties” button

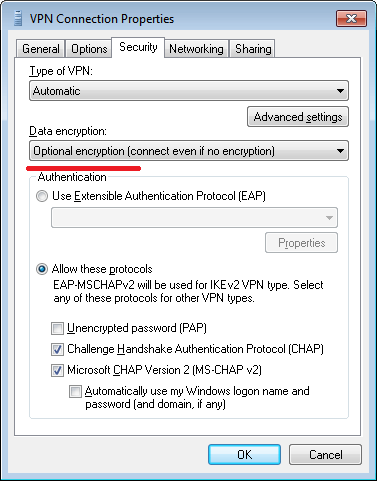
- Choose “Security” tab and select “Optional encryption”. Click OK button to save these settings.

- Click “Connect” button to connect to VPN server

